How to start a fitness blog: Step-by-step guide
Learn how to launch a fitness blog from scratch—choosing platforms, creating content, promotion strategies, and integrating Rezerv community tools.
If you run a fitness business, you already know how competitive the industry is. New gyms, personal trainers, and wellness studios are popping up every day, and standing out takes more than just great classes.
One of the most powerful (and often overlooked) tools to grow your business is a fitness blog.
Why? Because every blog post is a chance to:
- Show your expertise
- Build trust with potential clients
- Drive traffic to your website
- Turn curious readers into paying members
And the best part? You don’t have to be a professional writer to start. With the right strategy, your blog can work 24/7 to showcase your classes, share valuable tips, and bring more people through your doors.
In this guide, I’ll walk you step-by-step through starting a fitness blog, from picking your niche to creating content that not only ranks on Google but also drives real business results.
.jpg)
Source: Freepik
Why start a fitness blog?
We all know that as a fitness business owner, you already juggle a million things: managing classes, keeping members happy, dealing with bookings, and making sure your equipment is in top shape.
So why add “write blog posts” to your to-do list? Because a blog can be one of the smartest, most cost-effective marketing tools you’ll ever use.
And here’s why.
1. Build trust before someone ever walks through your doors
People don’t just sign up for a class anymore, they Google you first. They want to know if you actually know your stuff, if your approach fits their goals, and if your business feels like a place they’d be comfortable in.
A well-written blog post can answer all those unspoken questions. Share workout tips, nutrition advice, or behind-the-scenes stories, and you’re already building a connection before they even meet you.
2. Attract more of the right people
When you write blog posts around specific topics (like “beginner-friendly HIIT workouts” or “yoga for lower back pain”), you’re not just filling your website with words, you’re creating content that Google can show to people actively searching for those exact solutions.
That means more targeted traffic to your website, and more of the kind of clients who are likely to stick around.
3. Keep your brand top-of-mind
Fitness is competitive. Your clients are constantly being marketed to by other gyms, trainers, and studios.
But when you consistently share helpful content, you’re reminding them why they chose you in the first place. They see your name in their feed, their inbox, or their search results, and it reinforces your brand without feeling pushy.
4. Turn readers into paying clients
A blog isn’t just about sharing knowledge, it’s about giving people a reason to take action. When you pair your content with a clear next step (like “book a trial class” or “join our next challenge”), your blog becomes a direct booking tool.
And the more value you provide in your posts, the more likely readers are to trust you enough to hit that “sign up” button.
5. Future-proof your marketing
Social media algorithms change all the time. One day your posts are getting tons of reach, the next day they’re buried. But your blog lives on your own website.
You own it, you control it, and a single great article can keep bringing in traffic for years without paying a cent in ads.
.jpg)
Source: Freepik
Step 1 – Choose your fitness niche
Before you start writing blog posts, you need to figure out who you’re writing for and what kind of content will actually matter to them. That’s where choosing a niche comes in.
Now, if you’re already running a fitness business, chances are you already have a niche, you just may not have named it yet. And trust me, getting super clear on this makes everything easier: writing, marketing, showing up online… all of it.
So what is a niche, exactly?
It’s the specific angle or focus of your blog, and your business. Instead of trying to talk to everyone (which usually means you’re connecting with no one), a niche helps you speak directly to the people who are most likely to resonate with your style, your offers, and your brand.
Let’s talk about a few fitness blog niche ideas to get you thinking:
- Strength training for women – Perfect if your gym helps women feel confident lifting weights without the intimidation factor.
- Fitness for busy professionals – Great if you offer short, high-impact classes for people who don’t have time for 90-minute workouts.
- Postpartum fitness – If you work with moms, this is gold. Blogs like “Safe Core Exercises After Birth” or “How to Start Working Out Again After a Baby” are super valuable.
- Yoga for beginners – There’s a ton of demand for this, especially if your studio makes yoga accessible to people who feel too stiff, shy, or unfit.
- Functional fitness for older adults – If you specialize in mobility, low-impact workouts, or building strength safely as people age, this niche is often underserved.
- Nutrition tips for gym-goers – Maybe you or your team includes a nutritionist. Blog posts around meal prepping, fueling workouts, or supplement guidance are highly searchable and build authority fast.
The key here is to match your niche to what you already do best in your business. Don't try to be the next big influencer or go viral on TikTok. Instead, use your blog to serve your ideal clients better, the people who are already showing up (or could be showing up) to your classes.
Still unsure? Ask yourself these:
- Who do you love working with?
- What questions do people keep asking you
- What topics are you passionate about that tie directly to your services?
Once you lock in on your niche, creating content becomes way less overwhelming. You'll know exactly what to write, who you're helping, and how that content connects back to your services.
.jpg)
Source: Freepik
Step 2 – Pick a memorable blog name
Let’s talk about naming your blog, because this part can be surprisingly hard.
You want something catchy, easy to remember, and ideally, something that gives people an instant idea of what your blog (and your business) is all about. And since your blog is an extension of your fitness brand, the name should reflect your personality and your niche.
So, if you’re wondering how to name a fitness blog, here’s the golden rule:
Clarity beats cleverness.
It’s tempting to go for something super creative or punny (and that can work) but if people can’t tell what your blog is about just by hearing the name, you might lose them before they even visit your site.
Here are a few things to keep in mind:
1. Keep it simple and searchable
You want your blog name to be easy to spell, say, and type into Google. Avoid weird spellings or complicated mash-ups. Think about what someone would search for if they were looking for what you offer.
2. Reflect your niche or audience
If you’re focused on strength training for women, or yoga for beginners, try to include a word or two that hints at that. It doesn’t have to be super literal, but it should feel connected. For example:
- StrongHer Fitness
- Breathe & Begin
- Fuel & Flex
See how those give a vibe and a hint of what the content’s about?
3. Make sure the domain name is available
Once you have a few name ideas, do a quick check to see if the domain is available. Use tools like Namecheap or GoDaddy. Ideally, you want a .com version, it’s the easiest to remember and looks more professional.
Tip: Even if your first-choice domain isn’t available, don’t panic. You can try adding a simple word like “fit,” “blog,” “life,” or your location. For example: CoreCollective.com might be taken, but CoreCollectiveFit.com could be free.
4. Check social handles
Consistency across platforms helps build a strong brand. Check if the name (or a close variation) is available on Instagram, YouTube, TikTok, and Facebook, especially if you plan to promote your blog on social media.
5. Test it out loud
Say it. Share it. Ask a few friends. Does it sound like you? Is it easy to remember? Can people spell it without asking twice? If yes, you’re good to go.

Source: Freepik
Step 3 – Set up your fitness blog
Okay, you’ve picked your niche and nailed the name, now let’s get your blog online. If you’ve never done this before, don’t worry. You don’t need to be a tech wizard to figure out how to set up a fitness blog, you just need the right tools and a clear plan.
Let’s break it down step-by-step so you can get your blog up and running without the headache.
1. Choose a blogging platform
This is where your blog will “live.” There are a bunch of options out there, but the most popular (and beginner-friendly) platforms include:
- WordPress.org – The most flexible and powerful option. It's free, but you’ll need to pay for hosting. Great for long-term growth.
- Squarespace – A drag-and-drop builder with sleek templates. Everything’s all-in-one, so it’s easier to set up.
- Wix – Similar to Squarespace, very user-friendly with lots of customization options.
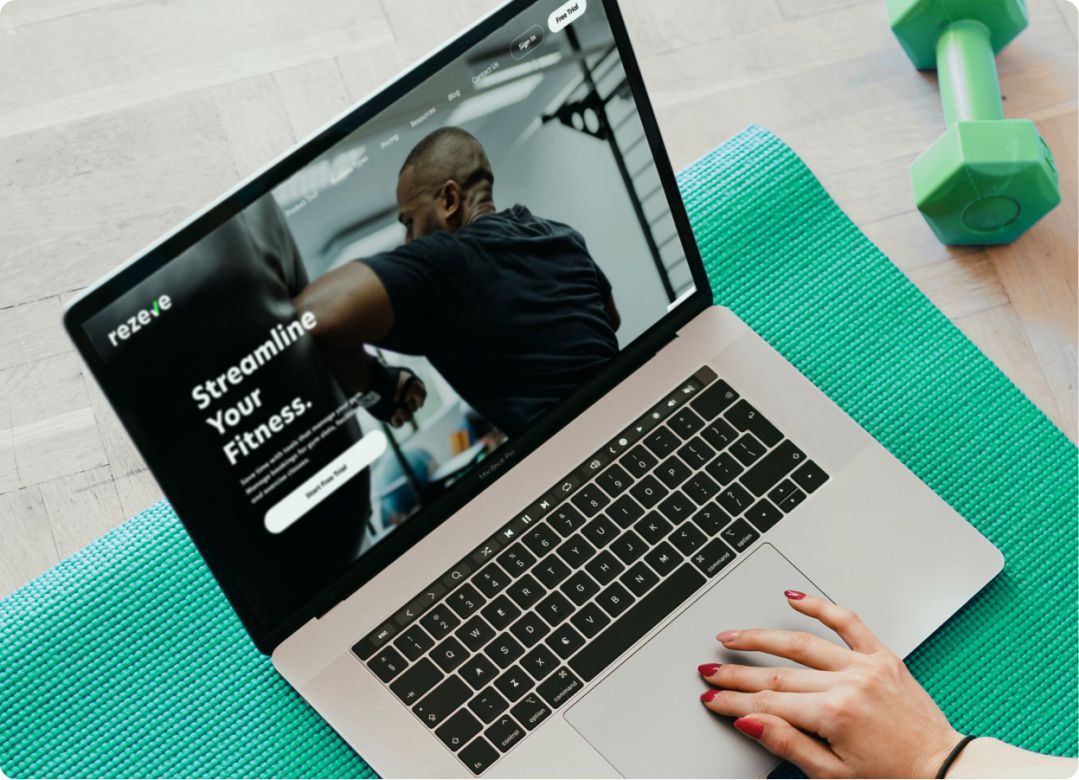
If your fitness business is already using Rezerv, you can actually skip the whole “extra platform” hassle, it has a built-in website and blog feature so you can write, publish, and link directly to your class bookings without juggling multiple tools.
2. Get a domain name & hosting
If you’re not using an all-in-one platform like Squarespace or Wix, you’ll need a domain name (your website address) and hosting (where your website files are stored).
Here’s what to do:
- Buy your domain name – You can get it from places like Namecheap, GoDaddy, or Google Domains.
- Choose a hosting provider – If you’re using WordPress, try Bluehost or SiteGround. They’re affordable and beginner-friendly.
- Most hosts will walk you through connecting your domain to your site — it’s easier than it sounds, promise.
✅ Using Rezerv? You’re already covered.
If you’re using Rezerv, you don’t have to worry about this step at all. Rezerv already includes your domain name and hosting in the package. That means you can skip the tech setup and jump straight into designing your site and writing blog posts.
3. Pick a theme or template
Your theme controls how your blog looks. In the fitness industry, a clean, mobile-friendly design is a must. Choose a template that:
- Loads quickly
- Is easy to navigate
- Makes your blog content stand out
- Has space for calls-to-action (like “Book Now” buttons or newsletter sign-ups)
If you’re on Rezerv, you can use its drag-and-drop builder to customize your site design without touching a single line of code, perfect if you want it to look professional without hiring a designer.
4. Set up essential pages
Before you publish your first post, make sure you have:
- About Page – Share your story, credentials, and why people should trust you.
- Contact Page – Make it easy for readers (and potential clients) to reach you.
- Services or Classes Page – Clearly show what you offer and how to book.
- Blog Page – Where your latest posts will live.
5. Install key plugins or features
If you’re on WordPress, install plugins like:
- Yoast SEO or Rank Math (for search optimization)
- MonsterInsights (to track traffic)
- WPForms (for contact forms)
Rezerv users? Most of this is already built in, plus you’ll have booking integrations, payment options, and marketing tools ready to go.
.jpg)
Source: Drazen Zigic on Freepik
Step 4 – Plan your content strategy
So your blog is set up and looking sharp, now comes the real game-changer: deciding what you’re going to post.
This is where most fitness business owners get stuck. They get excited, write one or two posts, then run out of ideas and stop. That’s why planning your content strategy in advance is crucial. It keeps you consistent, on-topic, and focused on creating posts that actually grow your business.
1. Start with your goals
Ask yourself: What do I want my blog to do for my business?
- Do you want it to attract new clients?
- Showcase your expertise in a specific niche?
- Drive bookings for your classes, programs, or personal training?
Your goals will guide the type of content you create. For example, if your main goal is to get more class sign-ups, your posts might focus on the benefits of your training style, success stories from current members, or beginner-friendly tips that help someone feel confident enough to book.
2. Brainstorm your content pillars
Think of content pillars as the main categories you’ll post about again and again. Having these makes it easier to come up with new topics while keeping your blog organized.
Here are some fitness blog content ideas that work especially well for business owners:
Educational Content – Tips, how-tos, and guides that solve your audience’s problems.
- Example: “5 Stretches to Improve Flexibility Before Your Yoga Class”
- Example: “Beginner’s Guide to Strength Training Without Injuries”
Behind-the-Scenes – Give people a peek into your studio, your classes, or your personal training process.
- Example: “What a Day in Our Bootcamp Program Really Looks Like”
- Example: “How We Prepare for Our 6-Week Fitness Challenge”
Client Success Stories – Share real transformations and testimonials.
- Example: “How Sarah Lost 10kg and Gained Confidence in Just 4 Months”
- Example: “From Desk Job to 5K Runner: James’ Story”
Product or Service Highlights – Introduce your classes, packages, or special programs in a value-driven way.
- Example: “Why Our Small Group Training Gets Better Results”
- Example: “The Science Behind Our HIIT Method”
Seasonal & Trending Topics – Keep things fresh with timely content.
- Example: “5 Fitness Challenges to Kickstart Your New Year”
- Example: “Summer Workout Tips to Stay Cool and Energized”
3. Map it out with a content calendar
Instead of posting whenever inspiration hits, create a simple content calendar. You don’t need fancy tools, a spreadsheet or Google Calendar works just fine.
Start with 2–4 blog posts a month. Pick themes based on what’s happening in your business:
- Launching a new class? Write about what it is, who it’s for, and how to book it.
- Offering a promo? Create a blog post that explains the offer and shares tips on how to get started.
- Getting repeat questions from clients? Turn your answers into blog content.
This keeps your posts purposeful, they serve your readers and support your business goals.
4. Don’t just write, think “bookable content”
Here’s where you get ahead of most fitness blogs: tie your posts directly to your offerings.
You’re not blogging just to get likes, you’re blogging to get bookings.
Let’s say you’re a Pilates instructor. Don’t just write a blog post titled “5 Benefits of Pilates” and call it a day. Add a clear next step at the end:
“Ready to feel the difference for yourself? Book a free trial class today and experience the benefits firsthand.”
Now you’ve turned a helpful post into a reason to book a class.
And if you’re using Rezerv, it gets even better.
Rezerv lets you publish blog posts directly on your website and link them straight to your class booking pages.
That means you can add a “Book Now” button right inside the blog post, and when readers click, they don’t get bounced to a different site or external link. They stay on the same website they’re already browsing, which makes booking smooth, fast, and friction-free.
It’s a simple way to turn casual readers into paying clients, without them having to click around or search for your schedule.
5. Balance evergreen and trending content
- Evergreen content = topics that will stay relevant for months or years (like “Beginner’s Guide to Weight Training”). These posts keep bringing in traffic long after you hit publish.
- Trending content = time-sensitive topics that tap into what’s hot right now (like “How to Stay Fit While Traveling for the Holidays”). These can bring quick bursts of attention and help you stay relevant.
6. Use SEO to your advantage
If you want your blog to rank on Google (and bring in people who’ve never heard of you before), start doing basic keyword research.
Tools like Ubersuggest, Google’s autocomplete, or Answer the Public can help you discover what people are actually searching for. Then, tailor your blog topics to match.
Instead of writing “Why I Love Teaching Bootcamps,” go with “Beginner Bootcamp Workout: What to Expect in Your First Class.” It’s still personal, but it’s also search-friendly.
.jpg)
Source: Freepik
Step 5 – Write your first blog posts
You’ve planned your content. You’ve got your website ready. Now comes the part that makes most fitness business owners pause: actually writing your first blog post.
If your brain just went, “I have no idea how to start,” don’t stress. You don’t need to be a professional writer to create great content, you just need to know how to be helpful, clear, and a little bit human. If you use AI tools to help draft blog posts, it’s worth reviewing the text with an ai humanizer so the writing still sounds natural and personal to your readers.
Let’s break down exactly how to write fitness blog posts that connect with your audience and drive real business results.
1. Start with just one topic
Pick one simple, specific idea that’s easy to write about, something you already talk about with your clients all the time. Don’t overthink it.
A few great first post ideas:
- “What to Expect in Your First Strength Training Class”
- “5 Stretches to Do After a Workout”
- “How to Stay Motivated to Work Out When You’re Busy”
Stick to one clear focus per post. If you try to say everything in one article, you’ll overwhelm your reader (and yourself).
2. Use this simple structure
Here’s a go-to format that works for almost every blog post:
- Headline – Keep it clear and benefit-driven. Think: “Beginner’s Guide to HIIT” or “Why You’re Not Seeing Results from Cardio Alone.”
- Intro – Hook them in with a relatable problem or a quick story. Let them know what the post will cover and why it matters.
- Main points – Break things up with clear subheadings (like “Tip #1: Don’t Skip Warm-Ups”) so it’s easy to scan.
- Examples or action steps – Show how to apply your tips in real life.
- Call-to-action (CTA) – End with a next step: “Book a class,” “Join our email list,” “Try this workout and tag us.”
That’s it. Think of your blog post like a friendly conversation, not a lecture.
3. Write like you talk
Fitness blogs aren’t research papers. You don’t need to use fancy words or sound super polished. Just be real. Pretend you’re explaining something to a client who’s never heard it before.
Instead of saying: “Progressive overload should be implemented for muscular hypertrophy.”
Try: “To get stronger, you’ve gotta gradually increase how much weight you lift over time, that’s called progressive overload.”
See the difference?
Use contractions (“you’ll” instead of “you will”), keep your sentences short, and avoid jargon unless you’re going to explain it.
4. Make it easy to read
Most people skim blog posts. So let’s make it skim-friendly:
- Use short paragraphs (2–4 lines max)
- Break up long chunks of text with subheadings
- Add bullet points or numbered lists when explaining steps or tips
- Bold key takeaways to help them stand out
And don’t forget to include a few relevant images, especially if you’re demoing exercises, showing progress results, or promoting an upcoming class.
5. Optimize for search without sounding like a robot
Yes, SEO matters, you want people to find your post on Google. But keyword stuffing won’t help. Instead, naturally include your topic keyword (like “how to write fitness blog posts”) in the headline, intro, a subheading or two, and the closing paragraph.
Then add related terms your clients might search for. For example:
- “How to start a workout blog”
- “Fitness writing tips”
- “Creating fitness content for beginners”
Sprinkle them in where it makes sense, never force it.
6. Add a CTA that actually converts
Here’s where you turn readers into clients. Don’t just end your post with a “thanks for reading.” Give them a reason to take action.
Examples:
- “Book a free trial session now”
- “Check out our beginner-friendly class schedule”
- “Download our 7-day workout plan”
And if you’re using Rezerv, you can embed that CTA right into your post. Add a “Book Now” button that links directly to your class booking page, no need to send readers hunting around your site.
.jpg)
Source: Freepik
Step 6 – Promote your fitness blog
So, you’ve written your first few posts, now what?
Well, here’s the truth: even the best content won’t help your business if no one sees it.
That’s why knowing how to promote a fitness blog is just as important as writing it.
And no, you don’t need a massive following or a full-time social media manager to get the word out. You just need to be consistent, intentional, and a little bit scrappy.
Let’s walk through the best ways to get your blog in front of the right people, the ones who actually want to read (and book with) you.
1. Share it on social media, but do it smart
Instagram, Facebook, TikTok, Pinterest, wherever your audience hangs out, that’s where you should be sharing your blog posts.
But don’t just drop a link and hope for clicks. Instead:
- Pull out a bite-sized tip from the post and turn it into a Reel or Story
- Share a personal anecdote from the post as a caption
- Use a “carousel” format to break the blog into slides
- Ask a question at the end to spark engagement (e.g. “Do you stretch after workouts? Be honest 😅”)
And always, always link back to the full blog post, either in your bio, caption, or website button.
2. Repurpose blog content into emails
If you have an email list (even a small one), this is gold.
Don’t start from scratch, just repurpose your blog post into a short, engaging email:
- Share a tip or quick story from the blog
- Add a personal note (“A lot of my clients ask me about this…”)
- Link to the full post for those who want the deep dive
And if you’re using Rezerv, you can send automated email campaigns directly from your dashboard. Which means your blog → email → bookings flow becomes super easy to manage in one place.
3. Collaborate with local influencers or fitness creators
You don’t need A-list influencers to get traction. Reach out to local micro-influencers, loyal clients, or fitness bloggers with a small but engaged audience.
Ideas:
- Offer them a free class in exchange for sharing your blog
- Do a joint IG Live to talk about a blog topic
- Let them write a guest post or feature their story in yours
This not only spreads your content but also builds trust with new audiences through social proof.
4. Post in local or niche communities
Facebook Groups, Reddit threads, fitness forums, these places are full of people looking for help.
Find a few groups that match your niche (like “Fitness for Busy Moms” or “Runners in [Your City]”) and contribute genuinely. Don’t just drop your link, that’s spammy.
Instead, answer questions, offer tips, and when it feels right, say something like:
“I actually wrote a blog post on this last week if it helps, happy to share!”
It’s a slow-burn strategy, but it works, especially for niche, local traffic.
5. Use SEO to bring in organic traffic
This takes time, but it pays off long-term.
To give your posts the best chance of showing up in Google:
- Use keywords people are actually searching for (e.g. “how to fix lower back pain after deadlifts”)
- Add those keywords to your title, intro, subheadings, image alt text, and meta description
- Make your content easy to read (short paragraphs, bullet points, clear structure)
- Link between your blog posts and your service/class pages
Over time, Google will recognize your blog as a helpful resource, and start sending people your way, for free.
6. Highlight your blog inside your studio (yes, really)
If you run a physical space like a gym or studio, use that to your advantage!
- Put a small sign at the front desk: “Got knee pain when squatting? Read our tips at [yourwebsite.com/blog]”
- Add your latest blog post link in your class confirmation emails or post-class WhatsApp message
- Mention it at the end of class: “By the way, I just posted some cool warm-up routines if you want to check it out!”
It’s low effort, but highly targeted.
Common mistakes to avoid
By now, you’ve probably realized that blogging is more than just sitting down and typing whatever comes to mind. It takes strategy, consistency, and a little bit of trial and error. But to save you some time (and headaches), let’s talk about the biggest fitness blogging mistakes that trip people up, especially fitness business owners like you.
If you can avoid these from the start, you’re already ahead of 90% of the competition.
1. Trying to talk to everyone
One of the most common fitness blogging mistakes? Being way too broad.
When your content tries to speak to “everyone who wants to be fit,” it ends up connecting with… no one. Instead, get laser-focused. Are you helping postpartum moms? Runners with tight hips? Busy professionals trying to stay consistent?
Pick your lane and own it. Trust me, your ideal clients will feel like you’re talking directly to them (because you are).
2. Writing like a textbook instead of a human
Your blog isn’t a science journal, it’s a conversation with your future clients.
You don’t need big words or academic references to sound credible. In fact, writing too formally can make you seem distant or hard to relate to. Speak the way you do in your sessions or classes. Keep it simple, warm, and clear.
Remember: clarity builds trust. And trust leads to bookings.
3. Forgetting to add a call-to-action (CTA)
You just shared an awesome post on mobility drills or post-workout meals, now what?
So many fitness bloggers miss the opportunity to guide their readers toward the next step. Always include a CTA. Invite them to book a class, sign up for your newsletter, download a free resource, or just reach out with questions.
And if you’re using Rezerv, this is even easier. You can embed “Book Now” buttons right inside your blog posts, keeping everything smooth and conversion-friendly.
4. Inconsistent posting (AKA the blog ghost town)
You don’t have to publish three times a week. But if you post once, disappear for five months, then randomly post again? It’s hard to build momentum or trust.
Set a realistic schedule, even one post per month is great if you can stick to it. Consistency is what signals professionalism and keeps readers coming back for more.
Plus, consistent content gives Google more reasons to show your site in search results.
5. Not promoting your posts
Hitting “publish” is just the beginning.
One of the most overlooked fitness blogging mistakes is assuming people will magically find your content. You need to share it, on social media, in your emails, in your studio, everywhere.
Even reposting the same blog in different ways (tips, quotes, stories) is fair game. Your audience needs to see something a few times before it sticks.
6. Ignoring SEO completely
You don’t need to be an SEO expert, but a few basics go a long way.
If your blog titles are vague like “My Thoughts on Motivation”, no one’s searching for that. But something like “How to Stay Motivated to Work Out When You’re Busy”? That’s a phrase real people type into Google.
Use relevant keywords, structure your posts clearly, and optimize your titles and meta descriptions. Over time, you’ll start ranking higher and attracting organic traffic.
7. Treating the blog like a personal diary
Personal stories are awesome, they make you relatable. But they need to be tied to something useful for your readers.
Instead of just writing, “Here’s what I ate this week,” try: “My Go-To Meal Prep Plan for Busy Weeks (With Recipes You Can Try Too).” See the shift? It’s still personal, but now it’s helpful.
Your blog should always offer value, even when it’s about you.
Bonus: use Rezerv to turn blog readers into class bookings
Let’s be real, writing a blog takes a lot of effort. So if you’re going to spend time creating valuable content, it should actually help grow your business. Not just sit there looking pretty.
This is where a lot of fitness businesses drop the ball. They write great posts, but there’s no clear path for readers to do anything next. No link to book a class. No “Join Now” button. Just a dead end.
But when you use a tool like Rezerv, everything changes, because your blog becomes a sales tool that runs 24/7, turning casual readers into paying clients.
1. You can write and publish blogs directly on your site
Most booking software doesn’t even offer a blog feature. You’re stuck using a separate platform like WordPress or linking out to a totally different website. That’s clunky — and it kills conversions.
With Rezerv, your blog is part of your main site. You can write, edit, and publish blog posts right from your dashboard, no extra tools or tech skills needed. That means your “10-Minute Morning Stretch Routine” article can live on the same page as your class schedule.
And since the blog is built into your website, everything looks clean, branded, and professional — no weird redirects or off-brand blog templates.
2. Create a mobile-friendly website that converts
Here’s a reality check: most people will read your blog on their phone, not their laptop. If your site isn’t mobile-friendly, you’re losing bookings before they even start scrolling.
Rezerv’s built-in website builder automatically makes your blog and booking pages look great on any device. Buttons are easy to tap, text is easy to read, and your schedule is just a swipe away.
3. Create a smooth, professional experience
One of the biggest turn-offs for potential clients is a clunky user experience. If someone reads your blog, loves your content, and then has to dig through a complicated site just to book a class, you’ve already lost them.
Rezerv solves that by making your website (blog included) super intuitive and conversion-friendly. Readers can:
- Book classes without leaving your site
- See real-time availability
- Use local payment methods
- Even buy packages or memberships directly
So every blog post becomes a soft sales tool, gently guiding people from “just browsing” to “just booked.”
No awkward redirects. No opening five different tabs. No getting lost on a third-party website. It’s all connected and seamless, and that matters when you’re trying to turn interest into action.
Tip: How to add a “Book Now” button to your blog post
Want to make your CTA stand out visually? Here’s a super simple way to do it inside Rezerv’s blog editor:
- Go to Google and search for “Book Now button PNG”
- Choose a button design you like and save the image
- In your blog editor, upload the image
- Select (highlight) the image.
- Press Ctrl + K (or Cmd + K on Mac)
- Paste in your class booking page link (or specific class/package link)
Boom! now you’ve got a clickable button inside your blog post! It looks more polished than a plain text link and encourages more readers to take action.
Cheers,
Friska 🐨
FAQs
1. Do I need a separate website to start a fitness blog?
Not necessarily. If you already use Rezerv’s fitness class booking software, you can spin up a mobile-friendly website and blog right inside the same dashboard, no extra hosting or plugins required. Prefer WordPress or Squarespace? You’ll just need your own domain and hosting plan.
2. How often should I post new content?
Quality beats quantity, but consistency beats both. Aim for one solid post each week or two per month, whatever cadence you can sustain long-term. Search engines love fresh content, and a predictable schedule trains readers to come back.
3. What are the best fitness blog content ideas for trainers and studio owners?
High-performing topics include: beginner guides (“How to Start Strength Training at 40”), how-to workouts with demo videos, myth-busting posts, nutrition tips tied to your training style, client success stories, and local “best of” round-ups (gyms, parks, healthy cafés). All of these target long-tail keywords and naturally lead into booking CTAs.
4. How do I add a “Book Now” button inside a blog post?
In Rezerv, upload a button image (or design one in Canva), click it, press Ctrl + K (Cmd + K on Mac), and paste your class-booking link. On WordPress, highlight the text or image and use the link icon in the editor. A clear CTA dramatically boosts conversions.
5. Can I monetize my fitness blog beyond class bookings?
Absolutely. Popular revenue streams include affiliate links for gear or supplements, sponsored posts with wellness brands, digital products (e-books, workout plans), and display ads once your traffic scales. Just keep disclosures transparent to stay FTC-compliant.
6. What are the biggest fitness blogging mistakes newbies make?
The top culprits: talking to everyone instead of a clear niche, skipping keyword research, posting inconsistently, forgetting a call-to-action, and writing textbook-style content that’s hard to digest. Nail these basics and you’re already ahead of most bloggers.
7. How long does it take to see SEO results?
Plan on three to six months for a brand-new domain, sometimes faster if your site already has authority. Keep optimizing titles, meta descriptions, internal links, and add structured data like FAQ schema to speed things up.
8. Do I need schema markup for my fitness blog?
It’s not mandatory, but adding FAQPage or HowTo structured data boosts your chance of rich-result snippets, meaning more visibility and clicks. Rezerv or WordPress plugins like Rank Math make adding schema a one-click task.
Read next: Top 10 best gym management software
